Name Definition 4x4 Canvas

My son went to his first school friend party on the weekend and said on the way home: 'When I grow up I want to go to Ryker's house every day until I die!' Ok, that might be a bit unrealistic but glad he had fun! (Ryker has a great Lego collection.)

Here's a little 4x4" canvas I made using the new Alphabet Rotary Stamp (available from tomorrow- Tuesday 1st July). Oh yes, I am in love with this stamp just as I knew I would be. It co-ordinates beautifully with our Remember This and That Rotary Stamp too. 

Stamping on this size canvas was a little difficult as you can't put any backing in to hold the canvas firm. So I had to (imperfectly) patch a few of the letters with the basic black marker. But hey, that's what handmade is all about!

Susan Wong. Alphabet Rotary Stamp. 4x4 name definition canvas for a simple birthday present.

Little Feet on Bermuda Bay

Last week a truly lovely friend of mine had her 30th. Her obliging husband helped me get foot prints of all three children - twice, I might add, after I changed my mind on colour! And I should say I'm super stoked with the capacity of her kids to keep it a surprise for a whole week. Amazing!

Susan Wong. Framed Foot Prints


Bermuda Bay card 
Versamark Ink (It's clear so didn't leave evidence of ink on a foot - yah!)
White embossing powder

Just Add Ink #219

We have a très cool picture inspiration for you this week at Just Add Ink. Head on over to http://just-add-ink.blogspot.co.nz to see the rest of the team's work and join in the fun. Greys, blacks and splashes of yellow - very current - you can't go wrong really...


Ok, so I had this brainwave today: It's always annoyed me how using plenty of dimensionals behind a large surface will still go wavy or sag over time. So, to make my middle photo pop without the long-term sag effect, I mounted some thick cardboard behind it. Smart, I know. This is a case of K-I-S-S (keep it simple stupid).

Susan Wong. Kaleidoscope DSP Layout

This was my lovely son #1 back when those jeans didn't have holes in the knees and we still had both shoes. Boys are cool. Photography credit to Keri-Anne @ Dilworth Photography


Kaleidoscope Designer Series Papers (retires at end of June)
Smoky Slate, Whisper White card
Yippee-Skippee! Stamp Set ('happy')
Basic Black Stampin' Write Marker
Watercolor Wonder washi tape
Twine

DIY Kids Art Gallery

Since my eldest started drawing I've dreamed of a changeable art gallery where I can display kid creations. When we were renting I tried hanging three clipboards on the wall but they quickly got cluttered and, um, I'd painted them really badly. I considered a collection of frames but the hassle of paper orientation and size, wanting an easily changeable space and their incompatibility with 3D art put me off. 

So after trawlling endlessly on Pinterest I kept coming back to this curtain wire idea which I first saw along the walls of my arty friend's bedroom when I was a teenager (always inspiring me Jo). These are IKEA Dignitet curtain wires we got from a seller on TradeMe if you're wondering.

Susan Wong. IKEA Dignitet Curtain Wire gallery.


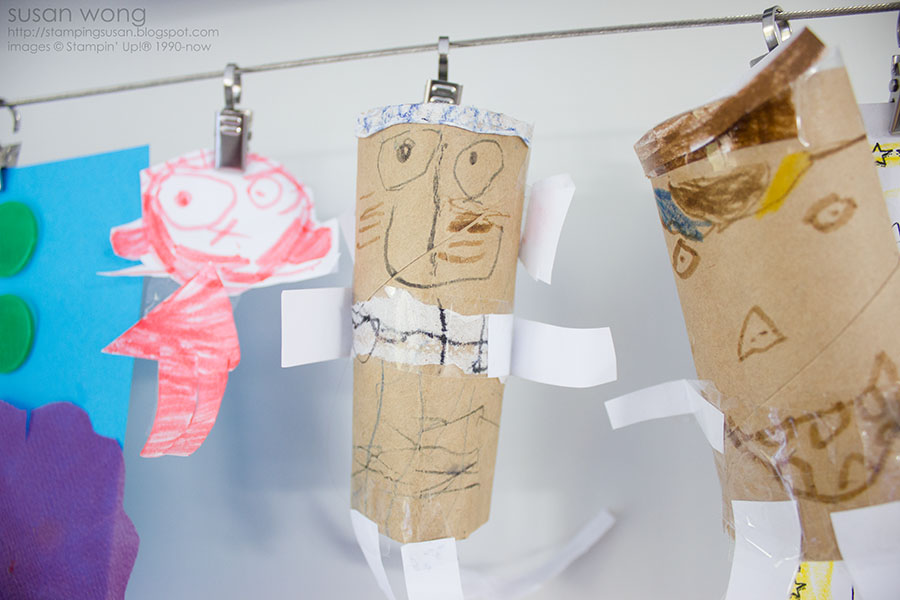
And just because I can, I have to share my favourite little work of art right now. It's my daughter's (3) toilet roll creature - a happy mouse (centre). Tail, ears and whiskers included. Teehee. Too cute. 

Toilet paper roll mouse


Here's to a little less guilt over throwing most of their art straight in the recycling bin.
Thinking about other possibilities too - Christmas displays...?? Birthdays...

Just Add Ink 217

This week the challenge at Just Add Ink is to 'Just Add Cupcakes/Cake/Dessert'. When thinking about what I wanted to make I resisted actually going to make REAL cupcakes and my hips are thanking me for it (I think). Get creative and join in the challenge!

Susan Wong. Cupcake Builder Punch Birthday Card. Yippee-Skippee Stamp Set.


Making the background for this was pretty simple. I sponged through a little stencil I made with the Cupcake Builder punch. Punch it, snip it, stick it back together. Ok, it's easier to show you...

Susan Wong. Cupcake Birthday Card stencil.

Tip: When sponging, the dryer your sponge is, the more control you have over shade and the less streaky it is. Dab on the ink then take some off on your scrap paper first. I learnt this from Paula Dobson, the Sponge/Brayer Queen, so they say.

And while I was at it, I finally remembered to decorate the inside of the card. It definitely needed it for a bit of balance given that it gets pretty weighty with four layers of card on the front.

Susan Wong. Cupcake Birthday Card detail.

Tip: I hand-wrote this greeting. Hmm, can you tell? Make your 'A' a triangle for a bit of a current geometric touch.


Yippee-Skippee! stamp set
Cupcake Builder punch for stencil
Coastal Cabana, Tangerine Tango, Smoky Slate, Real Red, Black
Stapled on Ruffle Stretch Trim (retiring end of June)
Dogeared corner